Adventures in Arithmetic


Addition Part One

Teacher’s Manual


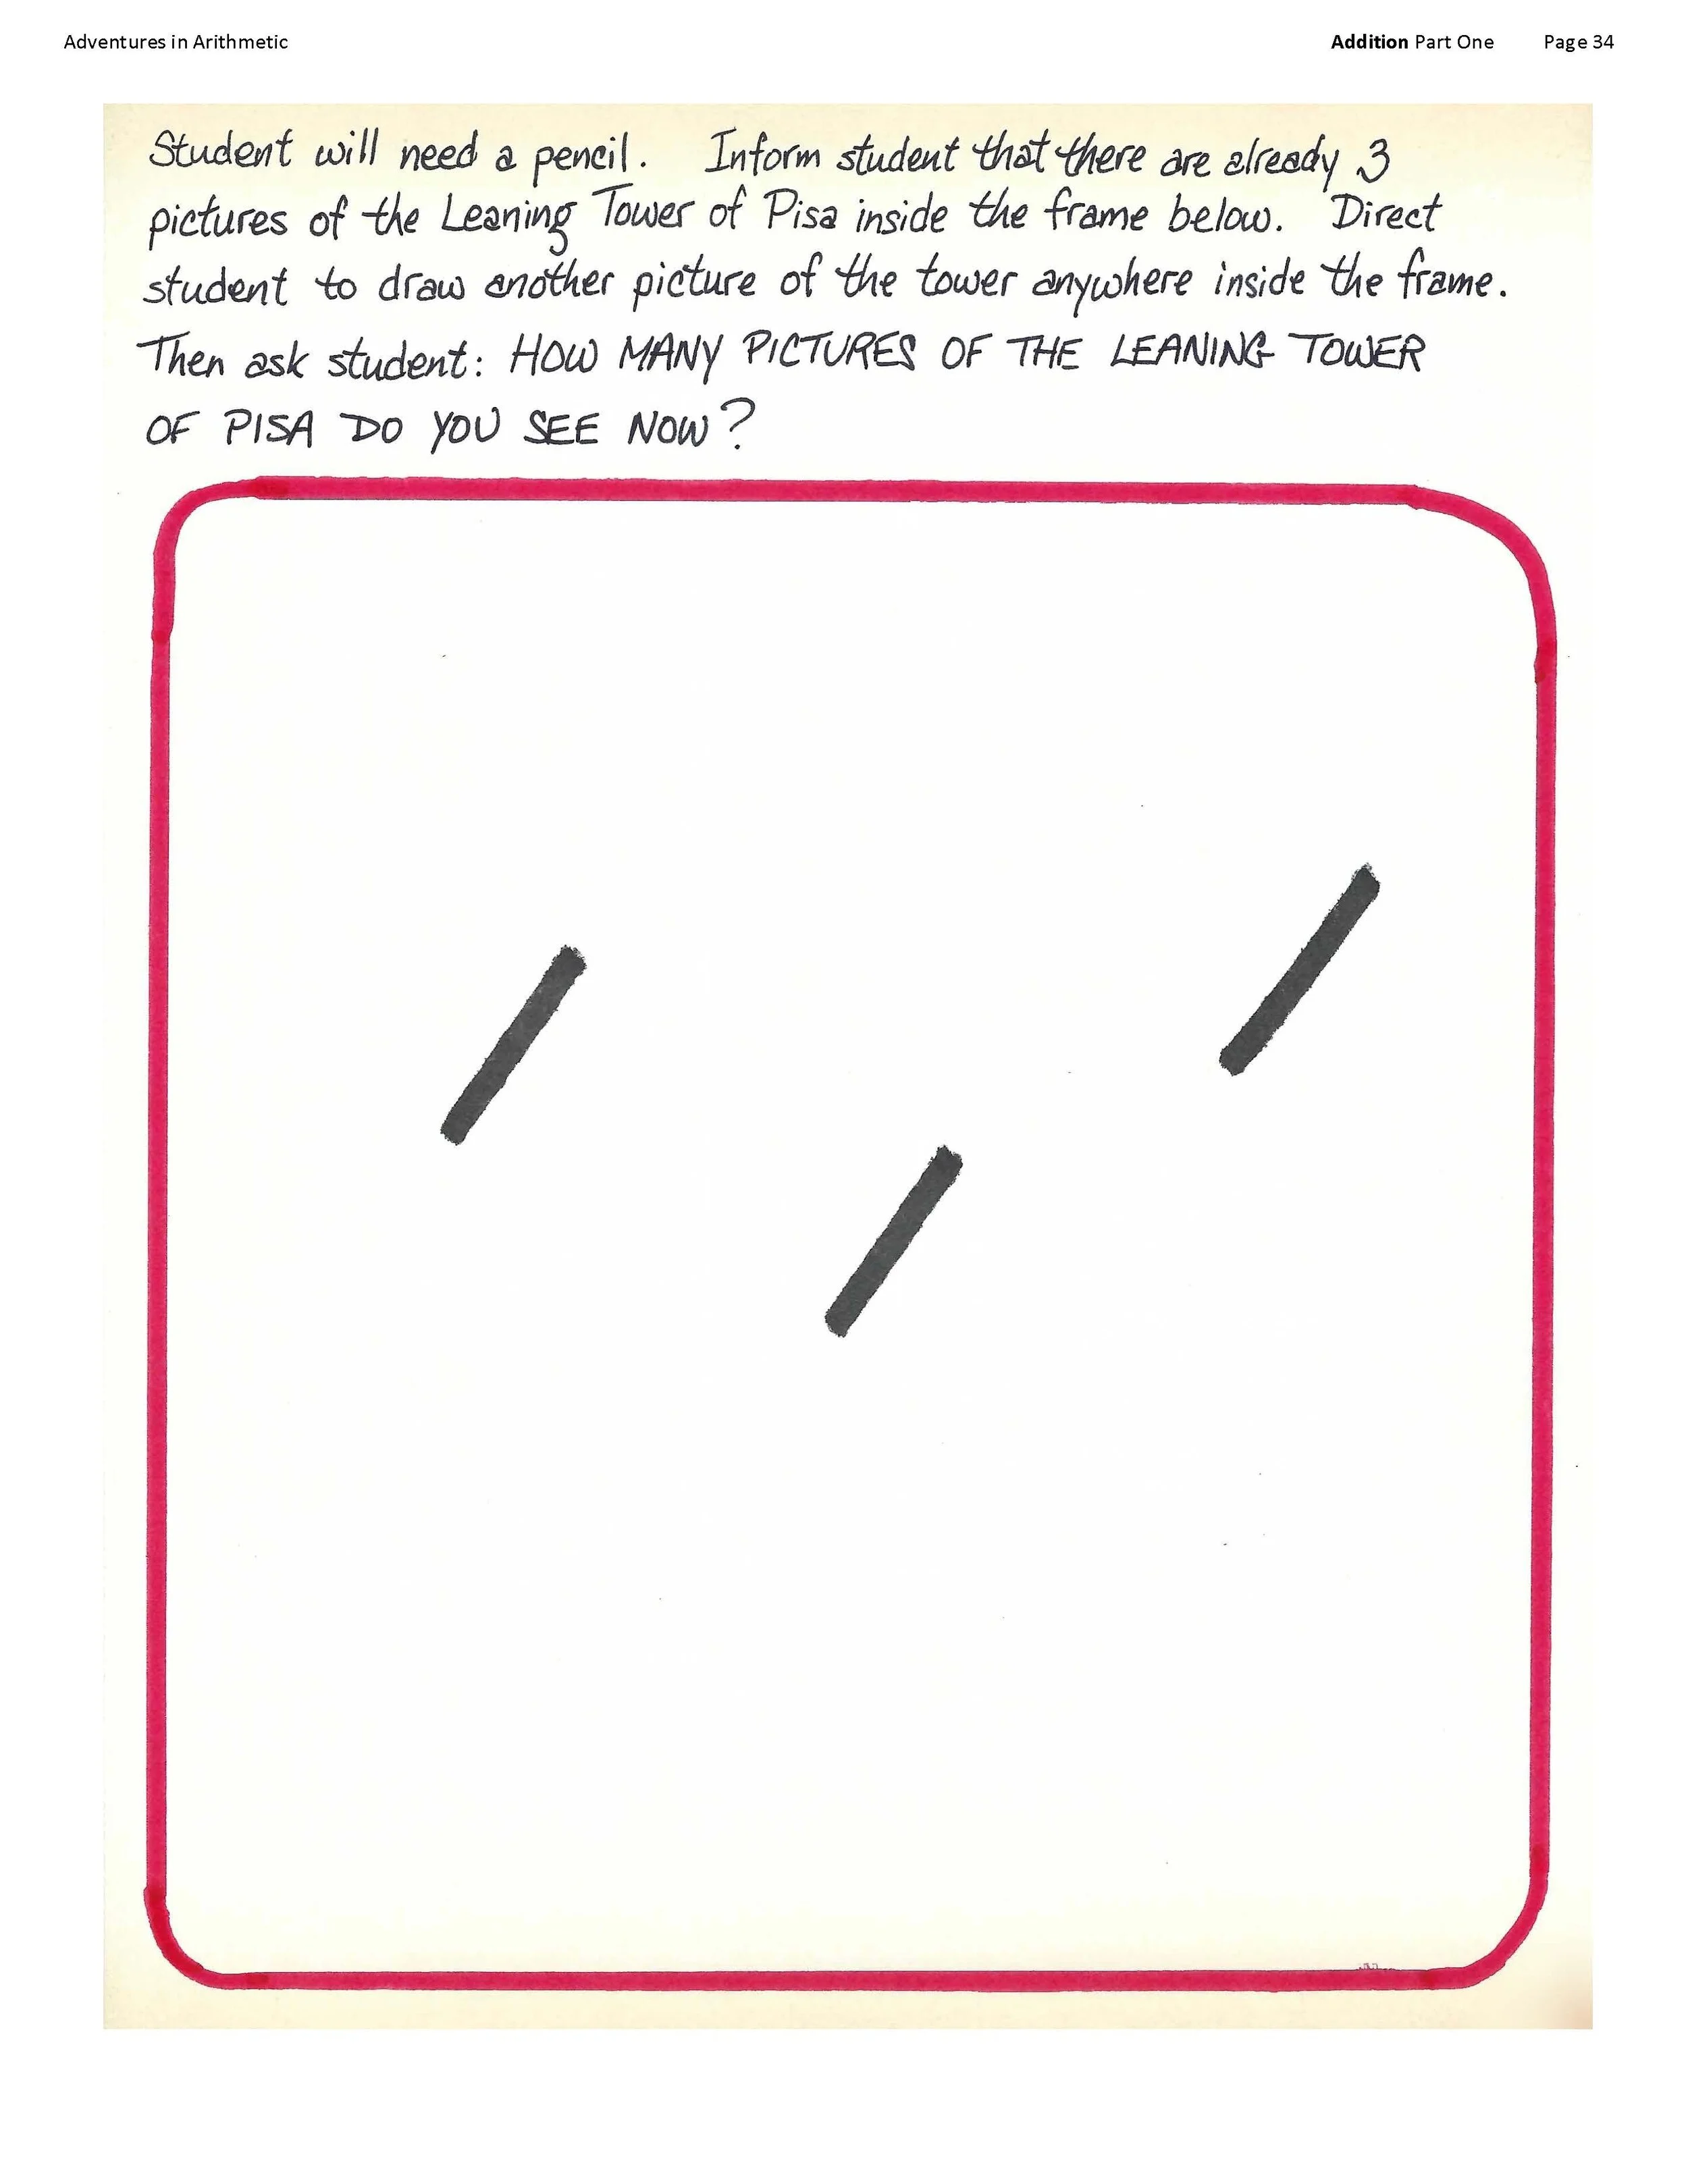
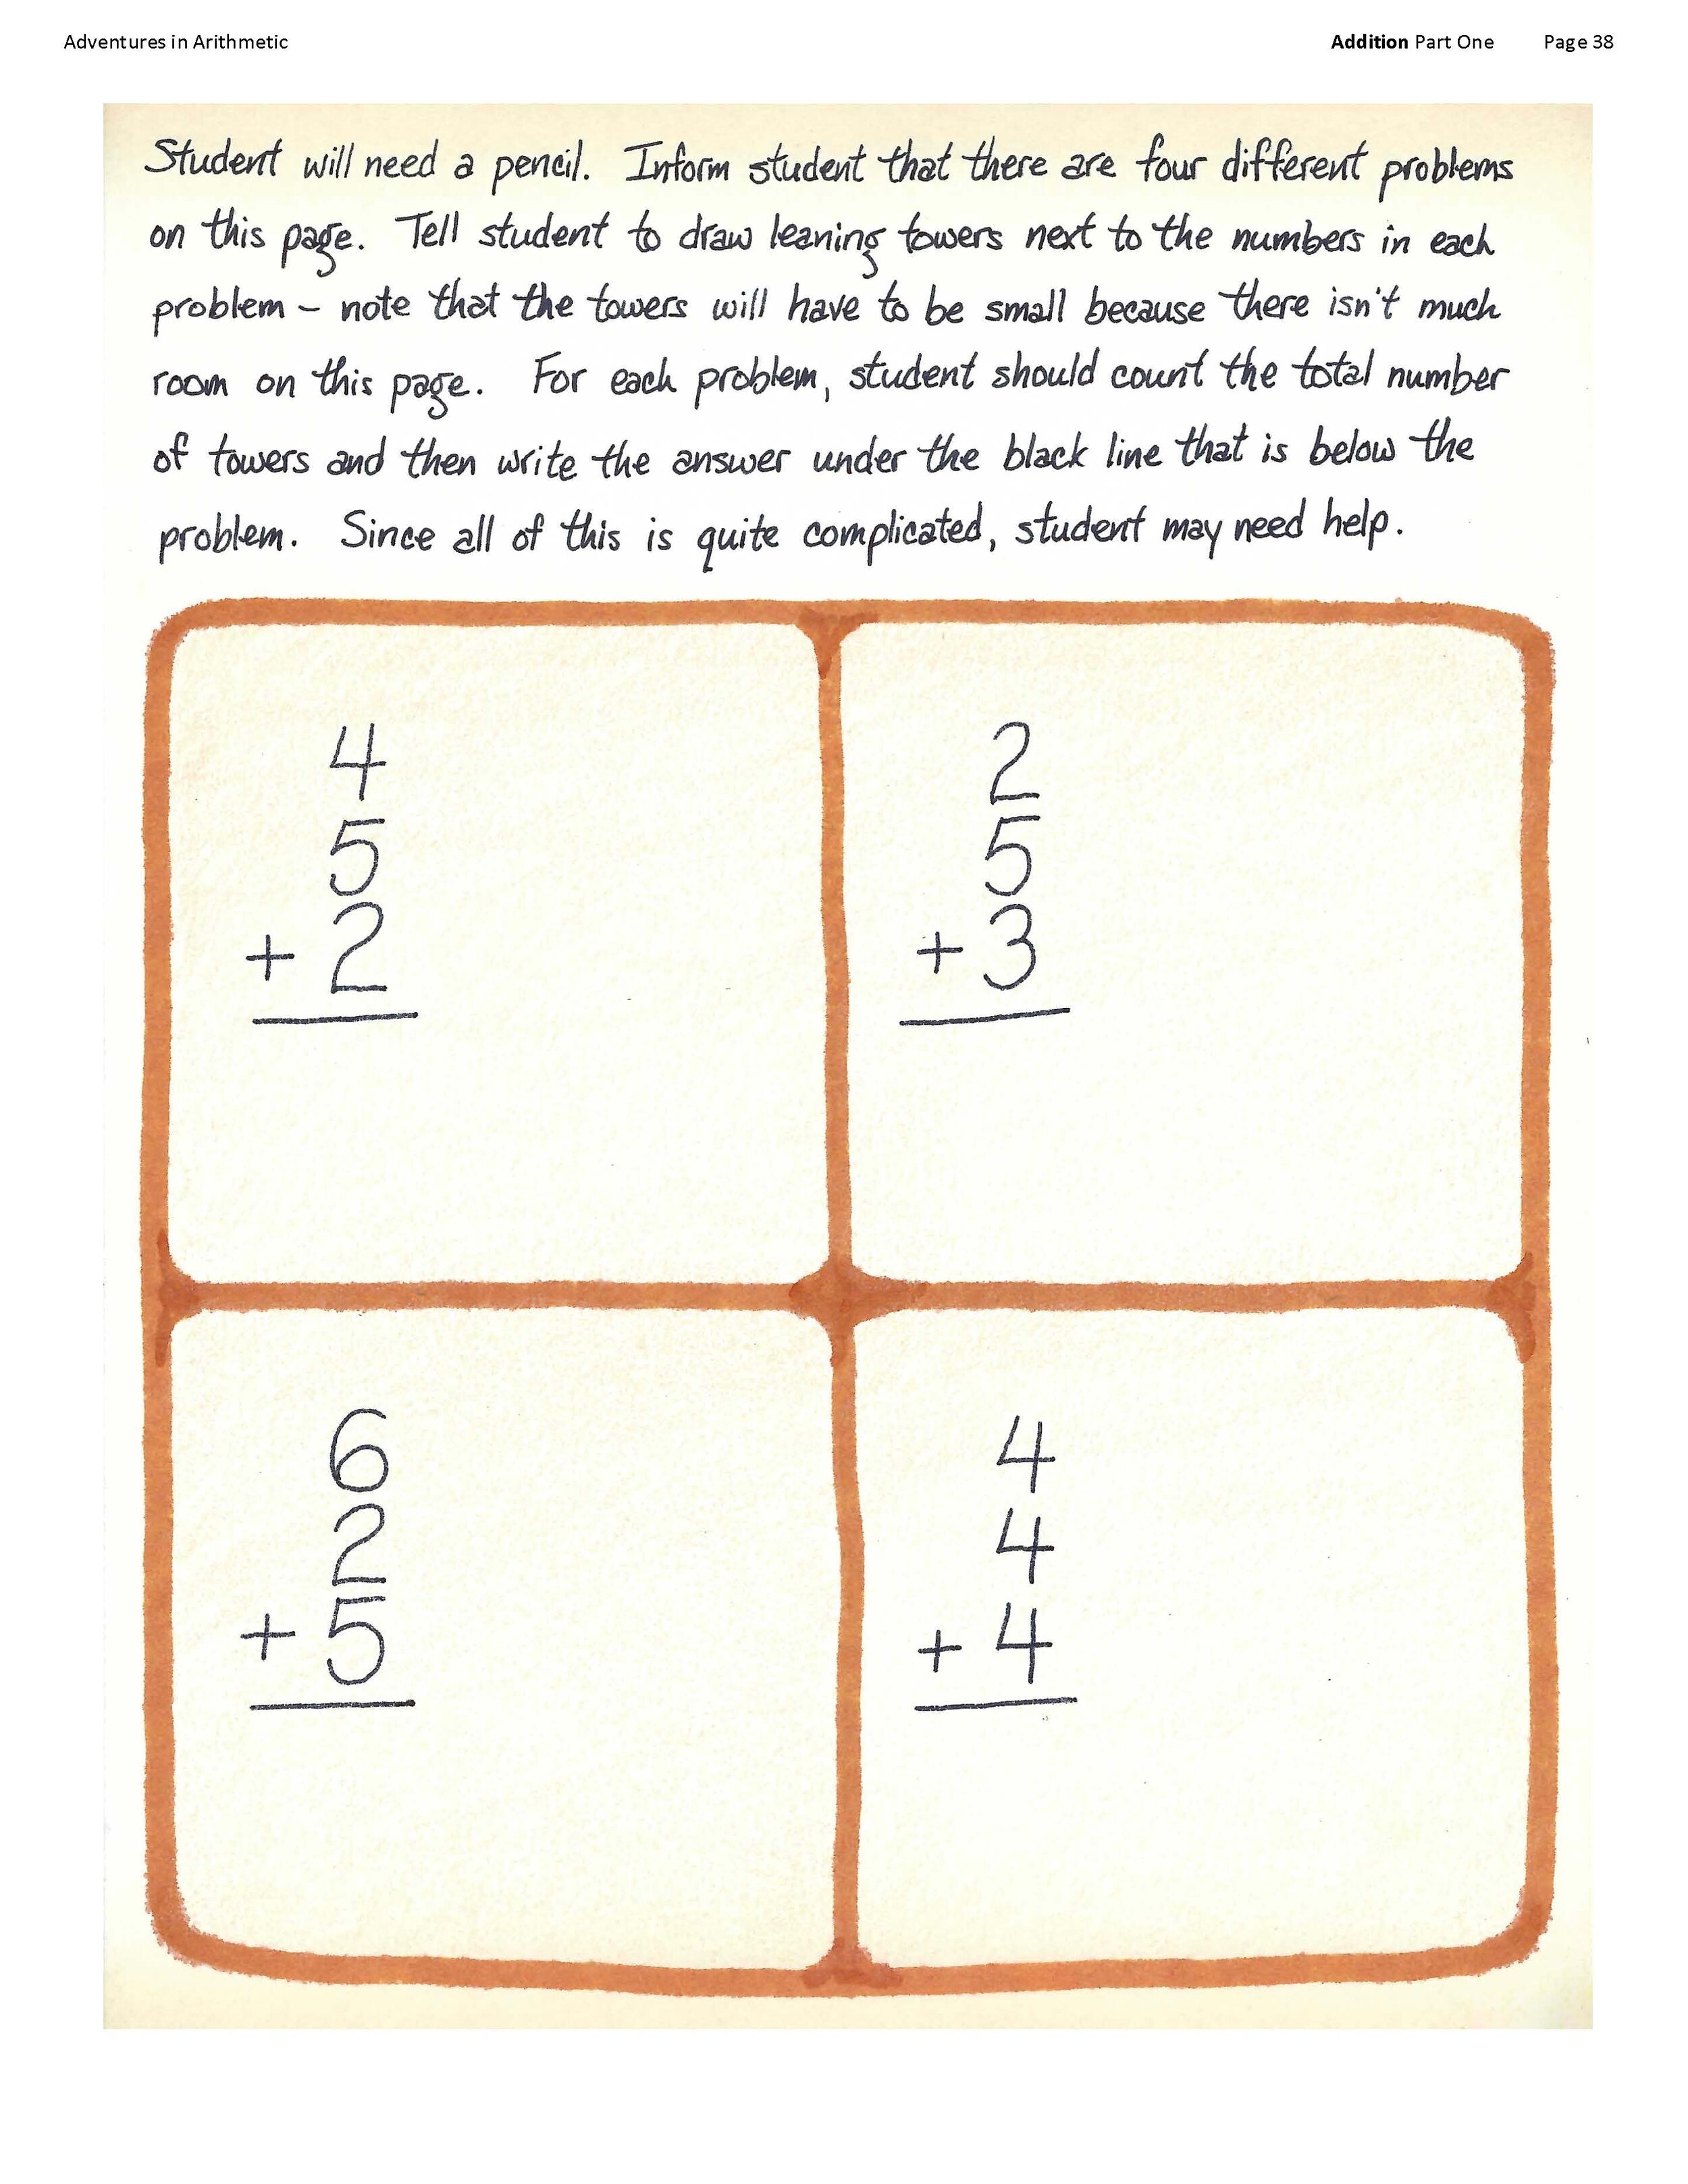
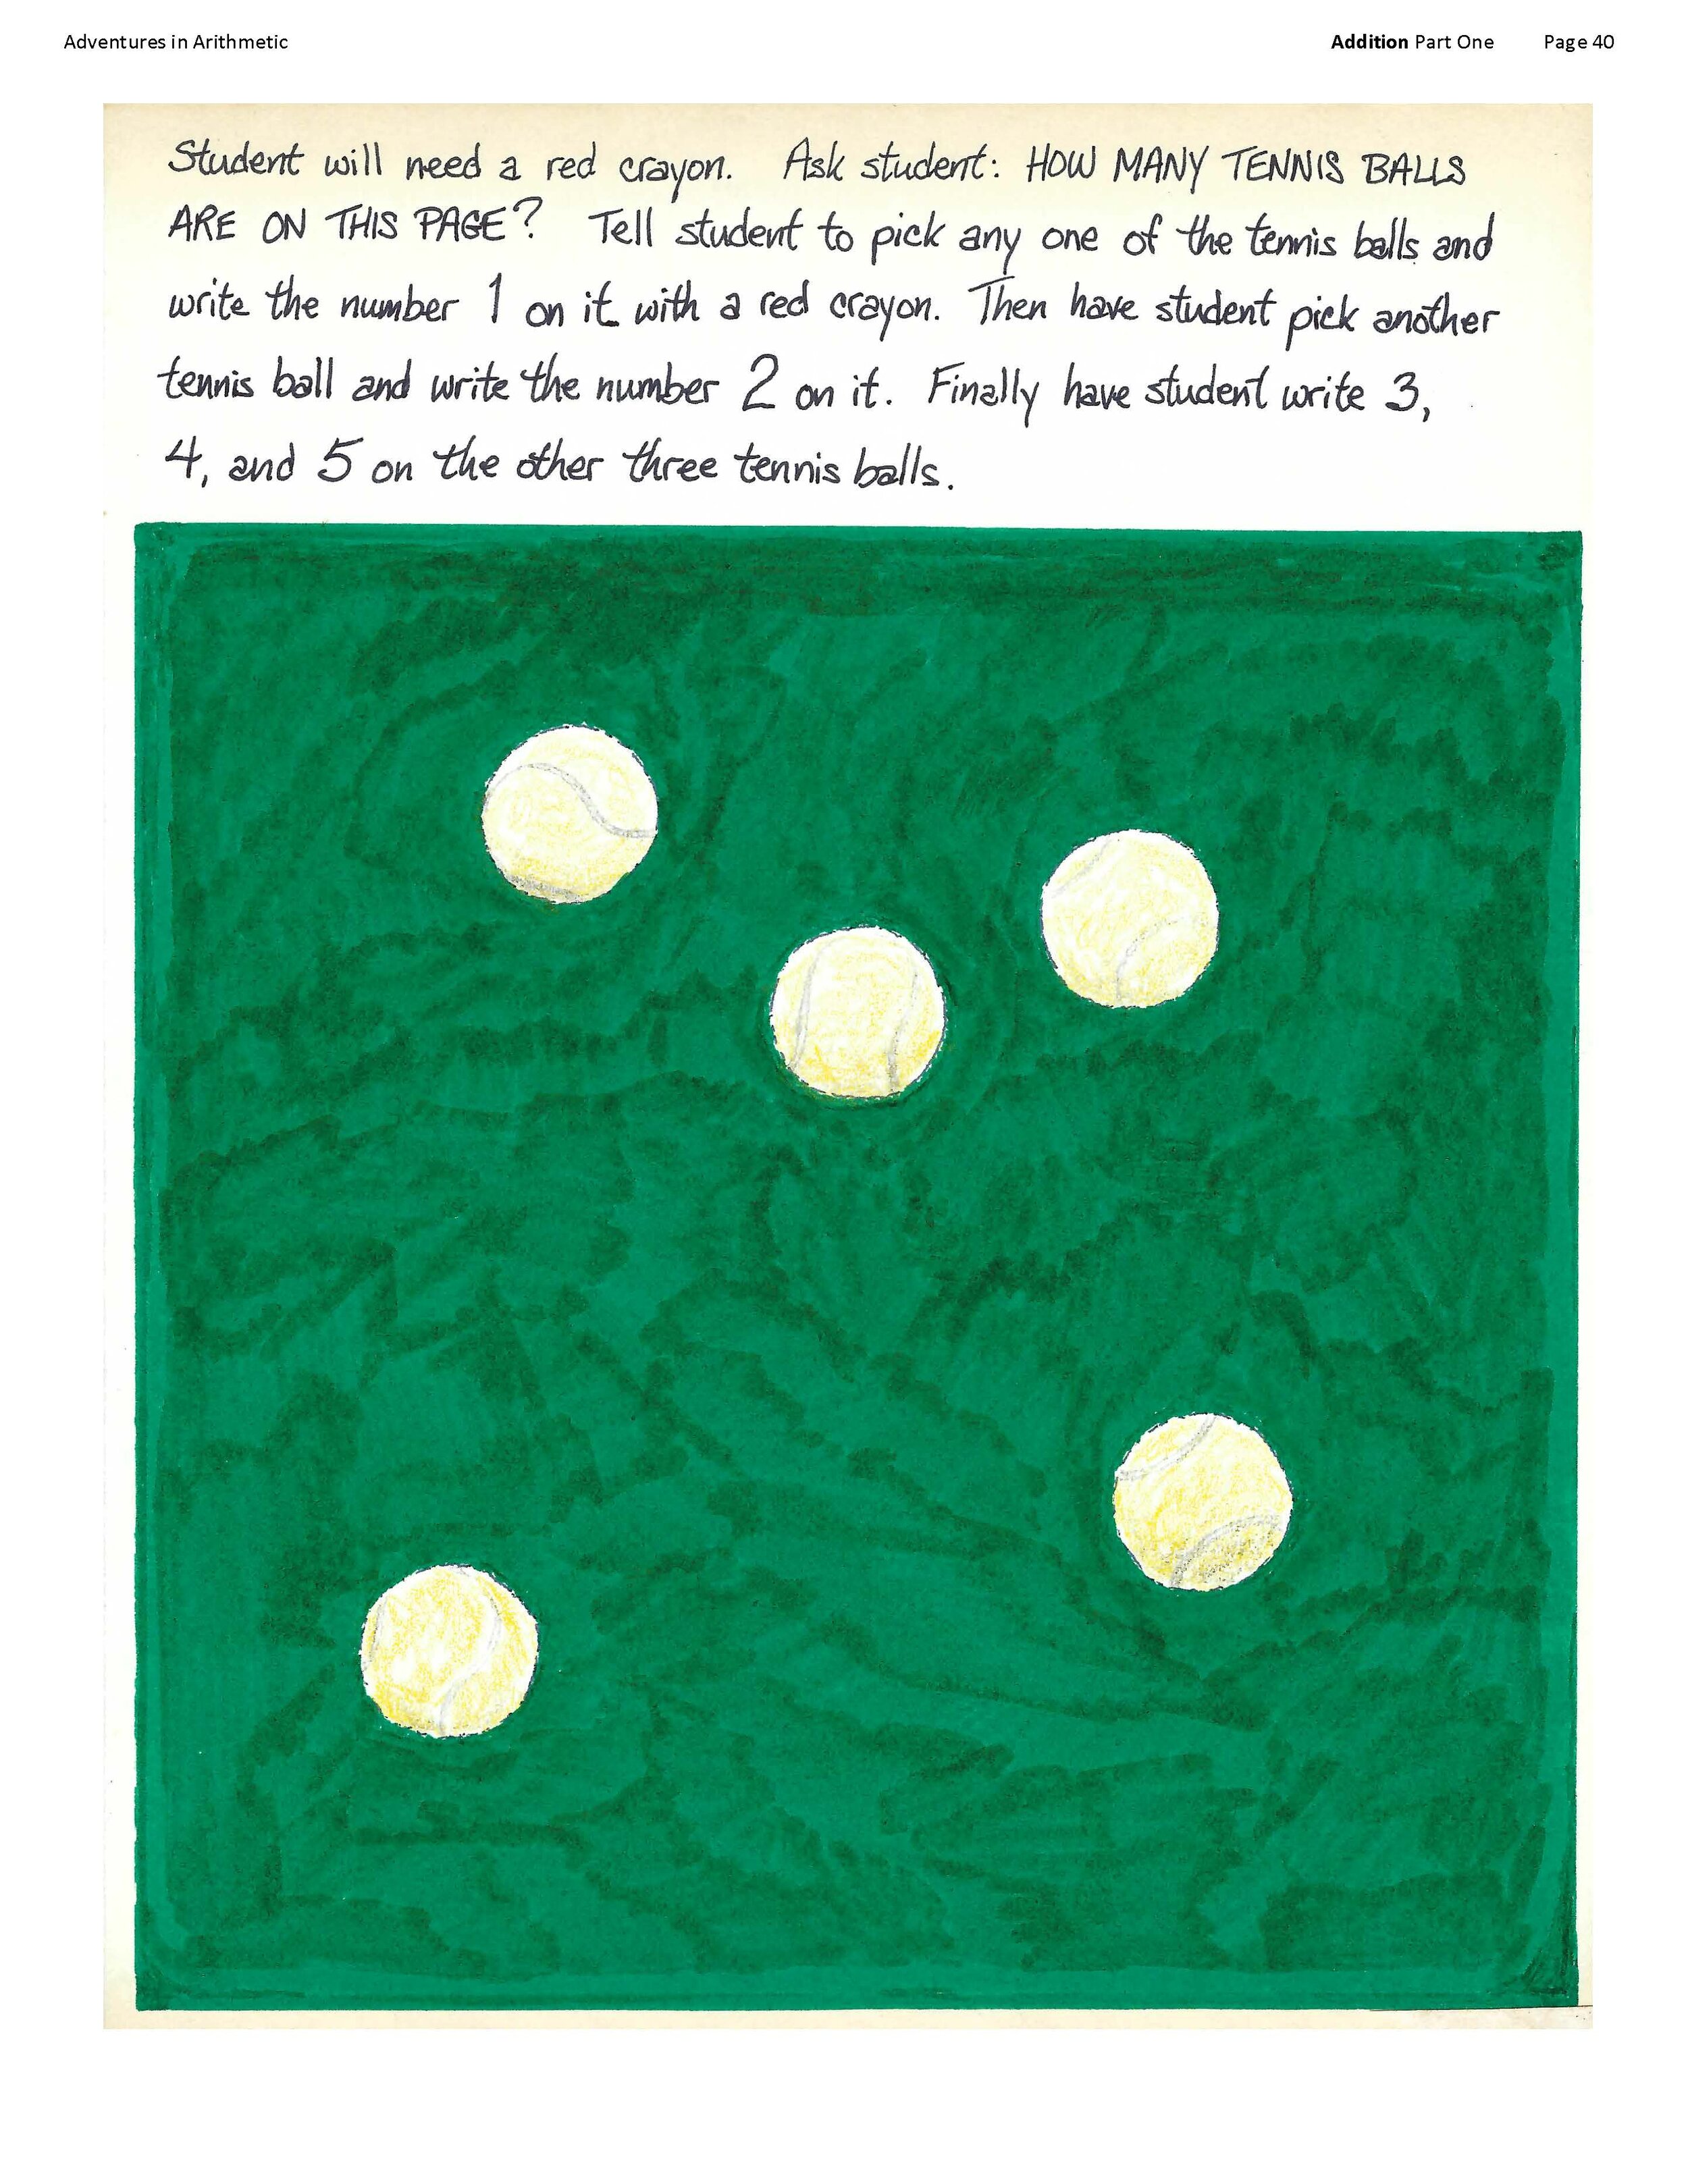
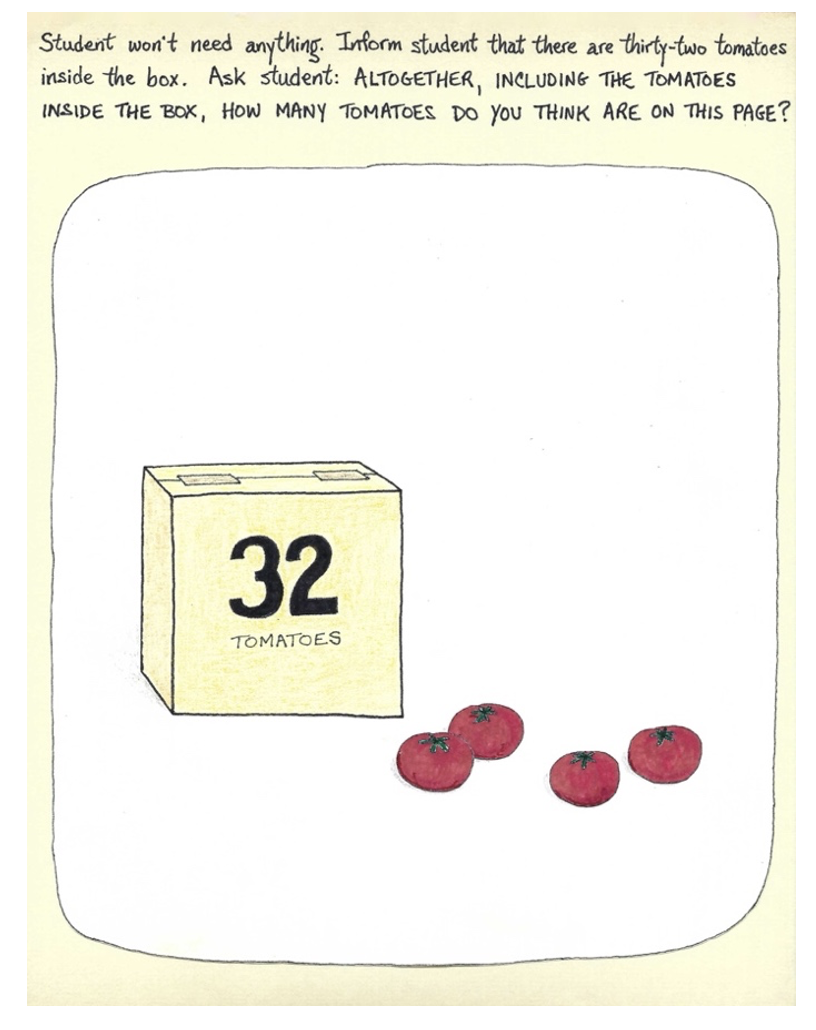
The ultimate goal of all the lessons offered on this website is to help students solve story problems when presented with a mix of addition, subtraction, multiplication, and division problems.  But before asking students to recognize which of the four mathematical operations would be an appropriate fit for each story problem in such a mix, I must first help students achieve a deep familiarity with each separate operation.  The lessons in “Block 1” concentrate exclusively on addition.

I intend for all of these lessons to be used by an adult (a teacher, a parent, or a tutor) working one-on-one with a young student.  The handwritten instructions on each lesson page tell adults everything I hope they will say and do while teaching the lessons.  But those handwritten instructions do not explain WHY I’m asking adults to say and do those things.  Those instructions do not explain what each page has been designed to teach, and very often what the lessons teach may not be immediately obvious.  This “Teacher’s Manual” DOES explain the purpose of each lesson, and I hope this will help adults better appreciate the intellectual progress that students will be making as they complete each assignment.


Page 1: “Green”

On this first page of “Block 1,”  I ask students to use a green crayon to fill in the white hole in the middle of the page.  I’m hoping that students will have little or no trouble figuring out what they are supposed to do on this page.  The purpose of this page (and the pages that immediately follow) is to ensure that students understand the “totality” concept behind words such as “all,” “altogether,” “both,” and “every.”  Understanding the concept behind those words is an essential step toward understanding addition, and it will be necessary for students to fully understand this concept in order for them to later understand and answer typical addition story problem questions such as “Altogether, how many pineapples did Penelope eat?”

Page 2: “Orange”

On this page, students are asked to use an orange crayon to fill in BOTH white spots.  Students are supposed to continue coloring until the whole image is orange.  Filling in the multiple spots on this page will require ever so slightly more thought and effort than was needed to fill in the single spot on the previous “Green” page.  I hope that this increased thought and effort will help students better comprehend the concept of totality.

Page 3: “Paint It Black”

In this lesson, I’m asking students to say how many white spots are on the page before they use a black crayon to make all of the spots disappear.  The purpose of this lesson is to expand upon and reinforce what students have so far learned about totality.  In order to respond that they can see four spots on this page, students will need to think of the spots collectively rather than individually.  And they will need to consider ALL of the spots, not just SOME of them.  This is precisely the sort of thinking that addition requires.


Page 4: “Two Carrots”

The instructions for this lesson direct students to “color both carrots orange.”  In previous lessons, when students had finished their coloring tasks, each entire page had ended up a uniform color.  I’d hoped that making each entire image a uniform color would provide students with an important clue to the meaning of words such as “all” and “both.”  I now hope they will no longer need that clue in order to understand the meaning of the word “both” in this page’s instructions.  The word “both” (and the idea of totality that goes with that word) applies here to a group of objects which will remain distinct from the background (and from each other) even after they are colored in.  This is a small step forward.  A very small step, but a step.

Page 5: “All the Flowers”

The instructions on this page direct students to color all of the flowers orange.  Students will not fully understand the concept behind the word “ALL” until they are able to think about “NOT ALL.”  Completing the coloring task on this page will take some time.  During the process of coloring, I believe students will inevitably ask themselves either consciously or subconsciously, “Have I finished yet?  Have I colored all of the flowers yet?”  When students ask themselves those questions, they are recognizing a distinction between “ALL” and “NOT ALL.”  Encouraging students to become increasingly aware of that distinction is a goal of this lesson and of the lessons that follow on the next several pages.

Page 6: “Eggs”

The handwritten instructions on this page call for students to find the white egg and to color that egg red.  That’s it.  Nothing more.  The instructions do not ask students to talk or think about anything in particular as they complete this assignment.  But I strongly suspect that students will notice that all of the eggs are NOT red before they color the white egg, and that they will also notice that all of the eggs ARE red at the end.  And unlike the previous lesson, in order to highlight the “NOT ALL” condition, this page starts out with a picture where not all of the items look alike.


Page 7: “Mint Jelly”

In this lesson students are twice asked to say how many jars are green.  They are asked this before and after they color the last jar green.  I expect students to notice that at the beginning of this lesson, five (but not all) of the jars are green.  And I expect students to notice that at the end of this lesson, all six of the jars are green.  Addition is about numbers, so it is important for students to think about numbers in these lessons.  Back in Lesson 3, I asked students to notice that there were four spots on an otherwise black page, but those spots disappeared as they were colored in, so it was not easy to think about any number other than 4 in that lesson.  Here students could see two numbers (a “before” and an “after” number).

Page 8: “Ketchup”

In this lesson students are twice asked how many bottles are red.  But I’m hoping that students will actually notice three numbers on this page.  (At the beginning of the lesson, three bottles are red and two bottles are not red; but at the end of the lesson, all five of the bottles in the picture are red.)  I’m further hoping that students will notice that two of those three numbers are associated with the way the picture looks at the start of the lesson, and that the third number is associated with the way the picture looks at the end of the lesson.  If students notice those three numbers, then they are getting close to understanding that 3 plus 2 equals 5.

Page 9: “Imagine”

In this lesson students are asked to hold a green crayon, but not to color anything with it.  Instead, students are asked to merely imagine that they will color the last “P” green.  They are then asked, “If you changed the white P into a green P, how many green P’s do you think would be on this page?”  I hope the previous eight lessons, along with holding a green crayon will help students imagine that all of the P’s are now green.  But it is still a real achievement to be able to see the number “4” in this picture.  In that sense, the total number of P’s on this page is the “unknown” in this addition situation.  If students say that they can imagine that there are 4 green P’s on this page, they should be congratulated.


Page 10: “Come Together”

On this page, students are directed to use scissors to cut out the meatball that “fell off the plate,” and then to move that meatball back onto the plate.  In this lesson, and in the lessons that immediately follow, students will be asked to generalize from the understandings that they were beginning to develop in previous lessons.  In previous lessons, I asked students to change the color of various objects to make them look more alike.  But here in this lesson, for the first time, objects are moving.  The meatballs start out apart, but then they move closer together.  A great many (but not all) addition story problems describe things that are “coming together” much as the meatballs do in this lesson.

Page 11: “Cookies”

This lesson is an extension of the previous meatball lesson.  Here students are directed to use scissors to cut out the cookie that is currently not on the plate, and to move that cookie onto the plate.  Afterwards, students are asked, “How many cookies are on the plate now?”  In the meatball lesson, I directed students to move a meatball, but I didn’t ask them to consider the totality of the resulting group.  Here, for the first time, I am asking students to consider totality in a “coming together” situation.

Page 12: “Socks”

This lesson presents another “coming together” situation, but the challenge here is slightly more advanced than in the previous lesson.  On this page, students are TWICE asked how many socks are on the chair.  They are asked this question both before and after they have moved two socks onto the chair.   I hope students will notice that the answers to the two questions are different even though the questions are the same.


Page 13: “Stars”

In this lesson students are directed to hold scissors, but not to cut out the star that is not on the envelope.  Students are directed to IMAGINE cutting out that star and moving it onto the envelope.  Students are then asked, “If you moved the star onto the envelope, how many stars do you think would be on the envelope?”  To correctly answer that there would be five stars on the envelope, students will need to imagine a “coming together” action that will not actually have taken place.  This is not easy.  I hope that asking students to hold the scissors will help them imagine cutting out the star and moving it onto the envelope.  When students eventually encounter “word” problems, they will need to be able to imagine a variety of actions.

Page 14: “Bananas”

In this lesson students are instructed to hold a pair of scissors.  Students are then told to direct their attention to the three bananas that are not on the plate.  Next, students are asked, “If you moved these three bananas onto the plate, how many bananas do you think would be on the plate?”  I think students are likely to notice three numbers during this lesson: the one banana that starts out on the plate, the three bananas that are not on the plate, and the four bananas that would be on the plate if all of the bananas were to “come together” there.  Of those three numbers, the number “four” is the hardest to see.  If students correctly answer the question in this lesson, then they are well on their way toward understanding totality.

Many adults were taught in school to associate addition with stories in which two separate groups join together to form a single group.  That is a good way to think about addition, but it is somewhat limiting,  because not all addition story problems describe groups of objects that are coming together.  In the introductory addition lessons I’m presenting here, I’ve included several lessons where objects can be thought of as coming together, but I’ve also encouraged students to think about totality in situations where there is no coming together movement.  In the lessons that follow the banana lesson above,  there is very little movement.  I hope that this will help prepare students for a broad range of addition story problems, including problems that do not describe any coming together action.

Pages 15 and 16: “Both Sides Now”

These two pages were designed to be printed on opposite sides of the same sheet of paper.  The handwritten directions on Page 15 direct students to examine both sides of the paper, and after that to hold up the paper in front of a bright light.  Students are then asked, “Can you see three butterflies?”  It should be possible for students to see all three butterflies at the same time, even though the butterflies are in different locations (on opposite sides of the sheet of paper).  I hope this lesson, along with the lessons that immediately follow, will improve students’ ability to combine groups in their minds, even if those groups are actually in separate places.


Pages 17 and 18: “Stamps”

These two pages were again designed to be printed on opposite sides of the same sheet of paper.  The handwritten directions on Page 17 direct students to notice that there are two stamps on the reverse side of Page 17.  After that, students are directed to hold up the paper in front of a bright light.  Then students are asked, “How many strawberry stamps can you see now?”  It should be possible for students to see five stamps.  This lesson is very much like the butterfly lesson on Pages 15 and 16, except that in this lesson students are asked to come up with the total number of stamps on their own, while in the previous lesson students were asked only a “yes” or “no” question about the total number of butterflies.  I hope that the experience of successfully answering the “how many” question in this lesson will prepare students for the next lesson, which looks similar, but is far more challenging.

Pages 19 and 20: “If”

Again, these two pages were designed to be printed on opposite sides of the same sheet of paper.  The handwritten directions on Page 19 direct students to notice that there is one star on the reverse side of the page.  Students are NOT instructed to hold up the paper in front of a bright light.  Instead, students are asked, “If you let light shine through this paper, how many stars do you think you would see?”  This is the first time in any of these lessons that students have been asked about the size of a group that they could not fully see, all at one time.  I hope students will correctly intuit that they would see four stars.  But even if they answer incorrectly, I would be satisfied if students seem to understand the question that they are being asked, because understanding the question would suggest that they have made progress toward understanding the concept of totality.  After answering how many stars they would see, students are directed to hold up the paper in front of a bright light to see if their answer is correct.

Pages 21 and 22: “Scarlet Letters”

Once again, these two pages were designed to be printed on opposite sides of the same sheet of paper.  The handwritten directions on Page 21 direct students to examine both sides of that sheet of paper, and to notice that there are A’s on both sides.  Students are NOT instructed to hold up the paper in front of a bright light.  Instead, students are asked, “Altogether, how many red A’s do you think there are?”  I hope that students will consider this to be a fun challenge.  It is okay for students to guess incorrectly, and to be told that there are six red A’s on the sheet of paper.  The main goal of this lesson is to encourage students to spend some time thinking about totality.


Page 23: “Jellybeans”

In this lesson, students’ attention is directed to the picture of the purple jellybean.  Students are requested to use an orange crayon to draw an orange jellybean next to the purple jellybean.  After students have drawn an orange jellybean, they are asked, “How many jellybeans are in the picture now?”  Up until now, students have been manipulating and looking at pre-existing pictures. But in this lesson, and in each of the lessons that immediately follow, they will be asked to add new drawings of their own to pre-existing illustrations.  This is a step toward asking students to solve addition problems by drawing pictures that correspond to the numbers in those problems.

Page 24: “More Jellybeans”

At the start of this lesson, students are asked, “How many jellybeans are in this picture?”  Students are then directed to draw a red jellybean somewhere in the picture.  Afterwards, students are asked, “How many jellybeans are in the picture now?”  Arithmetic is about numbers.  The point of the two questions in this lesson is to encourage students to realize that the number of jellybeans in the picture has changed from three to four as a result of their artistic contribution.  The questions are intended to ensure that students will be thinking about numbers as they complete this lesson.

Page 25: “X’s”

In this lesson, students are first directed to add a red “X” to the picture.  Then students are directed to add a blue “X” to the picture.  After that, students are asked, “How many X’s are in the picture now?”  I hope that students will correctly answer that there are now five X’s in the picture.  I hope they will not in any way be distracted or confused by an awareness that they themselves added two of those X’s to the picture.  I hope the fact that no two X’s in the finished picture will be the same color will provide students with a subtle clue that they are intended to concentrate on the total number of X’s in the picture, while overlooking any differences within the overall group of five X’s.


Page 26: “More X’s”

On this page, students are directed to use a red crayon to draw two red X’s somewhere in the picture.  Afterwards, students are asked, “How many X’s are in the picture  now?”  I hope students will correctly answer that there are now four X’s in the picture.  I think that this lesson is more challenging than the previous lesson.  In the previous lesson, I tried to minimize any distractions that might prevent students from concentrating on the entire group of X’s.  Here, I'm hoping that students will correctly concentrate on the total number of X’s DESPITE a possible distraction: there will be two red X’s and two blue X’s in the final picture, and the color differences will be quite conspicuous and difficult to disregard.

Page 27: “Even More X’s”

In this lesson, students are directed to use an orange crayon to draw three new X’s in the picture.  The fact that there were no orange X’s in the original picture should make it easier for students to monitor their progress as they draw the three orange X’s that they have been instructed to draw.  Afterwards, students are asked, “How many X’s are in the picture now?”  (The correct answer is of course seven.)  This lesson is similar to the previous lesson, but the numbers here are larger, which will mean that students will need to expend slightly more effort and thought than in the previous lesson.

Page 28: “String Beans”

In this lesson, students are told that the top picture on the page shows three string beans “standing up” and two string beans “lying down.”  Students are then asked, “How many string beans are in the top picture?”  (The correct answer is of course five.)  After that, students are directed to use a green crayon to draw a copy of the top picture inside the bottom frame.  In recent lessons, students have been adding new elements to existing pictures.  But in this lesson, and in the lessons that immediately follow, students will be asked to draw pictures where there are no pre-existing elements.  I consider this to be a major step forward.


Page 29: “More String Beans”

In this lesson, students are directed to use a green crayon to draw two string beans “standing up.”   Then students are directed to draw one string bean “lying down” in the same picture.  (If students seem puzzled by these instructions and unsure what to do, they should be shown the string bean pictures in the previous lesson.)  After students complete the picture in this current lesson, students are asked, “Altogether, how many string beans are in the picture?”  (The correct answer is of course three.)  If students can successfully draw the picture and correctly answer the question in this lesson, then in my opinion they are ready to understand and solve simple addition problems.

Page 30: “Addition”

In this lesson, students are told that the codes on this page are addition problems.  Students’ attention is directed to the “plus” signs, which they are told are characteristic of addition problems.  Students are informed that the “answer” to each problem is a number, and that an excellent way to get the answer is to draw string beans.  Students are directed to use a green crayon to draw “standing up” string beans for the first number in each code, and to draw “lying down” beans for the second number in the code.  Then students are instructed to count the number of beans in each completed picture and to write that number under the line in the code.  Students are told that somebody has already done the first problem.

Page 31: “Addition with Carrots”

In this lesson, students are first reminded that one way to solve addition problems is to draw string beans.  Then students are informed that it is also possible to solve addition problems by drawing carrots.  Students are told to use an orange crayon to draw “standing up” carrots for the first number in each code and “lying down” carrots for the second number.  Students are directed to count the carrots in each picture and to write that number under the line in the code.  Students are informed that somebody has already done the first problem.  One goal of this lesson is to give students more experience solving addition problems.  A second goal is to show that it is possible to solve addition problems without drawing string beans.


Page 32: “Addition with Jellybeans”

In this lesson, students are informed that it is possible to solve addition problems by drawing pictures of jellybeans.  Students are directed to use two crayons of contrasting colors.  They are instructed to use one crayon to draw jellybeans for the first number in each code, and to use the other crayon to draw jellybeans for the second number.  Students are then directed to count all of the jellybeans in each picture and to write that number under the line in the code.  Students are informed that somebody has already solved the first problem.  One goal of this lesson is to give students more experience solving addition problems.  A second goal is to show that there are ways to solve addition problems that don’t involve vegetables.

Page 33: “Vanilla and Chocolate”

This lesson is similar to the preceding jellybean lesson, with two main differences: this lesson involves vanilla and chocolate cookies rather than jellybeans, and the instructions to the student on this page offer far less guidance than the instructions for the previous lesson.  I hope that students will remember solving similar problems using jellybeans, and I’m hoping this memory, along with the fact that the first problem on this page has already been solved, will enable students to intuit how they are expected to solve the rest of the problems on the page.

Page 34: “Leaning Towers”

Students are informed that there are three pictures of the Leaning Tower of Pisa inside the red frame on this page.  Students are then directed to use a pencil to draw another picture of the tower somewhere inside the frame.  Afterwards, students are asked, “How many pictures of the Leaning Tower of Pisa do you see now?”  The new challenge in this lesson is artistic rather than mathematical.  Students will be directed to draw leaning towers in the lessons that follow this one.  I want students to learn to draw a leaning tower now so that they will be able to concentrate on the math in those lessons without thinking too much about how to draw towers.


Page 35: “More Towers”

Students are informed that there are four pictures of the Leaning Tower inside the frame on this page.  Students are directed to draw two pictures of the tower anywhere inside the frame.  Next, students are asked, “How many pictures of the tower are there now?”  Students are then directed to draw one more picture of the tower inside the frame.  Finally, students are asked, “Altogether, how many pictures are there now?”  In previous lessons, students have often combined two groups of objects, but this is the first time that students have been asked to combine three groups of objects (the original group of four towers, the two towers that students were initially directed to draw, and the single tower that they later added to the picture).

Page 36: “More and More”

In this lesson, students’ attention is directed to the five pictures of the Leaning Tower of Pisa that are standing in a row next to the green “5.”  Next, students are asked to draw three pictures of the tower next to the red “3.”  Similarly, students are directed to draw two pictures of the tower next to the blue “2” and four pictures of the tower next to the orange “4.”  Afterwards, students are asked, “Altogether, how many pictures of the tower are on this page?”  To correctly answer that there are 14 pictures of the tower on this page, students will need to disregard the conspicuously separate groupings, the numerals, and the fact that some (but not all) of the pictures were pre-drawn on the page.  Disregarding all of that will not be easy.

Page 37: “Addition with Leaning Towers”

In this lesson, students’ attention is directed to the “plus” sign, and students are informed that this symbol means that the problem on this page is an addition problem like the problems solved in previous lessons with string beans, carrots, and cookies.  Students are then instructed to draw four pictures of the Leaning Tower of Pisa next to the “4,” then two pictures next to the “2,” and five pictures next to the “5.”  Afterwards, students are directed to count all of the towers and to write this number “under the line.”  Students receive a lot of guidance during this lesson, but I’m hoping their experience solving the addition problem on this page will enable them to solve similar problems on the following pages with a lot less guidance.


Page 38: “Four Addition Problems”

Students are informed that there are four problems on this page.  Students are directed to use a pencil to draw small leaning towers next to the numbers in each problem.  Students are directed to then count the number of towers for each problem and to write the answer below the line.  There are a lot of numbers on this page, so there will be a lot of towers.  Students may need some help completing this page.  It is important for students to understand from this lesson that it is possible to add together more than two numbers.  And it is important that students appreciate that it is possible to solve problems like these by drawing towers.  But it is not important that they solve these problems without help.

Page 39: “Addition with Watermelon Seeds”

In this lesson, students are given some practice solving simple addition problems using watermelon seeds.  I hope that students will notice that some of the problems feature more numerals than other problems, and I hope they will realize that the same method can be used to solve all of the problems regardless of how many numerals are in each problem.

Page 40: “Tennis Balls”

Up until now, students have been adding together only very small numbers.  This lesson, along with several lessons that follow, is designed to prepare students to soon think about addition with larger numbers by reviewing the mechanics of counting.  At the start of this lesson, students are asked, “How many tennis balls are on this page?”  Then students are directed to pick any one of the tennis balls and to write the number “1” on it with a red crayon.  Students are next instructed to pick another tennis ball and to write the number “2” on it.  Afterwards, students are directed to write the numbers “3,” “4,” and “5” on the remaining tennis balls.


Page 41: “Potatoes”

This lesson continues the review of counting that began with the previous tennis ball lesson.  Students are directed to count the potatoes on this page, and while counting, to write the numbers “1” through “6” on the potatoes with a red crayon.  Afterwards, students are asked, “How many potatoes did you count?”  This lesson and the previous lesson are very easy.  They are intended simply to remind students of the relationship between the number of objects in a group and the final number that is said out loud when those objects are counted.

Page 42: “Light Bulbs”

In this lesson, students are directed to use a red crayon to write counting numbers (1, 2, 3, 4, and so forth) on the light bulbs.  When students have finished writing numbers on all the light bulbs, students are asked, “How many light bulbs did you count?”  There are so many light bulbs on this page that writing numbers on all of them will be a slow process, and completing this lesson will therefore take some time.  During that time, I expect that students will more than once ask themselves, “What number did I just write, and what number should come next?”  Encouraging students to ask themselves those questions is the main goal of this lesson.

Page 43: “Rings”

In this lesson, students are directed to use a red crayon to write counting numbers (1, 2, 3, 4, and so forth) inside all the blue rings.  Afterwards, students are asked, “How many rings did you count?”  Finally, students are directed to use a blue crayon to draw a new blue ring somewhere on this page, and then to use the red crayon to write the number “7” inside the new ring.  I expect students to understand why they have been asked to write the number “7” (and not some other number) inside the new ring.


Page 44: “More Rings”

On this page, students are directed to write counting numbers inside all the blue rings using a red crayon.  Students are then asked, “How many rings are there?”  Next, students are asked to draw a new blue ring anywhere on the page.  After that, students are asked, “What number belongs inside the new ring?”  Students are directed to write their answer inside the new ring with a red crayon.  This lesson is similar to the previous lesson except that here students are asked to figure out for themselves what number belongs inside the new ring.  Students may find it challenging to resume their counting after the pause during which they drew the new ring.

Page 45: “Marshmallows”

Students are informed that the things on this page that look like rings are actually marshmallows.  Students are directed to write counting numbers on all of the marshmallows with a pencil.  Students are then asked, “How many marshmallows are there?”  After that, students are directed to draw a new marshmallow somewhere on the page.  Students are then instructed to write a new number inside the new marshmallow.  Finally, students are asked, “How many marshmallows are there now?”  This lesson is similar to the previous lesson except for the final question, which requires students to make a connection between the number they wrote on the new marshmallow and the number of marshmallows now on the page.

Page 46: “More Marshmallows”

In this lesson, students are directed to use a pencil to write counting numbers on all of the marshmallows.  Students are then asked, “How many marshmallows did you count?”  After that, students are directed to draw three new marshmallows and to write new numbers on all of those new marshmallows. Finally, students are asked, “Altogether, how many marshmallows did you count?”  The lessons that preceded this one didn’t seem like they had much to do with addition.  But I hope students will notice here that they are being asked to think about totality again – that they are starting out with seven marshmallows, adding three marshmallows, and ending up with a totality of ten marshmallows.


Page 47: “Pre-Counted Marshmallows”

Students are informed that there are five marshmallows on this page and that those marshmallows have already been assigned counting numbers from 1 to 5.  Students are directed to draw a new marshmallow somewhere on the page. Students are then asked, “What number belongs on the new marshmallow?”  Students are directed to write their answer on the new marshmallow with a pencil.  It might seem that the fact that the original five marshmallows have already been assigned counting numbers would make this lesson easier than previous marshmallow lessons, but that is not the case.  Students must pick up the marshmallow count where somebody else left off, and they might find that difficult to do.

Page 48: “More Pre-Counted Marshmallows”

Students are informed that there are 23 marshmallows on this page and that the marshmallows have already been numbered from 1 to 23.  Students are directed to find marshmallow #23, which is down near the lower right-hand corner of the page.  Students are then instructed to draw two new marshmallows and to put new numbers on those marshmallows.  Finally, students are asked, “How many marshmallows are on the page now?”  This is not easy.  Students are essentially being challenged here to add two new marshmallows to an original group of 23 marshmallows, and to perceive that the resulting image contains 25 marshmallows, all without ever counting for themselves the original marshmallows.

Page 49: “Oops!”

In this lesson, students are told that unfortunately the picture that was supposed to appear on this page “didn’t come out.”  Students are informed that there were supposed to be four marshmallows on this page, and that those marshmallows were supposed to have been already numbered from 1 to 4.  Students are then informed that they themselves were supposed to have been asked to draw one more marshmallow.  Students are asked, “What number would have belonged on the new marshmallow?”  In previous lessons, students answered similar questions when they could see what they were doing.  Here, they are challenged to do the same thinking essentially in the dark.


Page 50: “More Imaginary Marshmallows”

In this lesson, students are directed to think about five marshmallows.  Students are told to imagine that those five marshmallows have been numbered “1, 2, 3, 4, and 5.”  Next, students are instructed to think about a new marshmallow.  Students are directed to use a pencil to draw a picture of just this new marshmallow.  Students are then asked to decide what number belongs on the new marshmallow, bearing in mind that the numbers from 1 to 5 have already been used.  Students are told to write the new number on the marshmallow that they drew.  This lesson is similar to the previous lesson except that in that lesson students were not instructed to draw or number any marshmallows.

Page 51: “Drawing Two New Marshmallows”

In this lesson, students are directed to think about eight marshmallows that have already been numbered from 1 to 8, and to then use a pencil to draw 2 new marshmallows somewhere on this page.  Students are asked what numbers belong on the new marshmallows.  (I hope that students will respond, “9 and 10.”)  Students are directed to write their answers on the marshmallows that they drew.  In the previous lesson, students were directed to draw and number just one new marshmallow.  But here, students are asked to draw and number two new marshmallows.  Thinking of appropriate numbers for two marshmallows is somehow much more difficult than deciding upon an appropriate number for only one.

Page 52: “Next”

In this lesson, students are directed to imagine that ten marshmallows have already been counted, and that the last number that was used in counting them was the number “10.”  Students are then asked, “What number should be used next after ‘10’?”  Students are directed to draw the next marshmallow and to write the new number on it.  In previous lessons, students were directed to think about an entire sequence of counting numbers leading up to a potential new marshmallow.  Here, students are asked to focus exclusively on the final number that was used in that counting sequence.


Page 53: “Addition with Marshmallows”

Students’ attention is directed to the addition problem on this page.  Students are informed that it is possible to solve addition problems by drawing pictures of marshmallows.  Students are further informed that somebody has already drawn fourteen marshmallows for the “14.”  Students are directed to draw marshmallows next to the “3” and to number them starting with the number “15.”  Finally, students are asked, “Altogether, how many marshmallows are on this page?”  Students are directed to write their answer under the line in the code.  I hope that students will fully understand why the new marshmallows should be numbered starting with “15” (and not starting with “1”).

Page 54: “Invisible Marshmallows”

Students are directed to imagine that there are 23 invisible marshmallows next to the “23” in the problem on this page.  Students are further directed to imagine that these invisible marshmallows have numbers on them from 1 to 23.  Students are directed to draw five marshmallows next to the “5,” and to write numbers on those five marshmallows starting with the number 24.  Students are asked how many marshmallows altogether are on this page (keeping in mind that some of those marshmallows are invisible).  Finally, students are directed to write the answer to that question under the line.  I hope students will understand why they were told to start with “24” when they wrote numbers on their five marshmallows.

Page 55: “More Invisible Marshmallows”

On this page, students are informed that invisible marshmallows have already been drawn for the first number in each code and that the invisible marshmallows have invisible numbers on them.  Students are directed to draw numbered marshmallows for the second number in each code, and then to write the appropriate totality number under each line.  This is very difficult, and it is okay if students need help deciding what numbers should be written on the marshmallows and what numbers should be written under the line in each code.  I hope that students will be surprised and pleased with themselves if they succeed in solving the scary-looking last problem on this page.


Page 56: “Addition with Peach Pits”

In this lesson, students are informed that it is possible to solve addition problems by drawing pictures of peach pits.  Students are directed to imagine peach pits for the first number in each code and to draw peach pits for the second number.  Students are told not to write numbers on the peach pits.  Instead, students are directed to figure out what number would belong on the last pit for each problem and to write that number under the line in the code.  Students are told that somebody has already solved the first problem.  This lesson is very difficult. Students will need to do a lot of imagining and a lot of reasoning in order to solve these problems.  Students may require some encouragement and some assistance as they work.

Page 57: “Tomatoes”

Students’ attention is directed to the picture of the red tomato on this page.  Students are informed that “there are twelve more tomatoes just like this one inside the box.”  Students are then asked, “Altogether, including the twelve tomatoes inside the box, how many tomatoes do you think are on this page?”  To answer that question, students will need to do the same kind thinking that they did during the previous peach pit lesson.  And yet, students are likely to find the tomato question on this page surprisingly easy.  I think that is because it is much easier to imagine tomatoes inside a box than it is to imagine invisible peach pits lined up next to a number in an addition problem.

Page 58: “More Tomatoes”

In this lesson, students are informed that there are 32 tomatoes inside the box.  Students are then asked, “Altogether, including the tomatoes inside the box, how many tomatoes do you think are on this page?”  That question, in my opinion, can legitimately be called an addition story problem.  And it’s a story problem that cannot be solved merely by observing and counting.  It requires some fairly sophisticated thinking.  If students correctly answer that there are 36 tomatoes on this page, they should be congratulated.  They will have demonstrated an impressive understanding of totality and addition.


Page 59: “Tulips”

In this lesson, students are informed that there is one tulip in the small pot and that there are 46 tulips in the large pot.  Students are then asked, “Altogether, how many tulips do you think are on this page?”  Like the tomato question in the previous lesson, this is an addition story problem.  I expect students to realize that it would be very difficult to count the tulips in the large pot and that it is not necessary to count them.  I hope students will have enough trust in the method that they used to answer the tomato question in the previous lesson that they will make a conscious choice to employ that same method here.

Page 60: “Daisies”

In this lesson, students are informed that there are two daisies in the small vase and 24 daisies in the large vase.  Students are then asked, “Altogether, how many daisies do you think are on this page?”  This lesson is similar to the previous lesson involving tulips.  However, I think that this lesson is ever-so-slightly more difficult.  In the previous lesson, students didn’t have much trouble deciding which tulips they didn’t need to count.  Here, it might take students a moment to realize that they should begin their calculations by considering the daisies in the larger vase.  It is not difficult to choose where to start here, but it does require a small amount of thought.

Page 61: “Addition with Elephants”

In this lesson, students are informed that it is possible to solve addition problems by drawing pictures of elephants.  Students are told that there are 43 elephants next to the red “43,” and that there are two elephants next to the “2” in the problem on this page.  Students are then asked, “Altogether, how many elephants do you think are on this page?”  Students are directed to write the answer to that question under the line.  In this lesson, the larger of the two numbers is the second number in the code.  I hope that students will realize that they can use the same method to solve the problem regardless of whether the larger number comes first or second.


Page 62: “More Elephants”

Students are informed that the person who was supposed to draw elephants for the problems on this page only had time to draw elephants for one of the numbers in each problem.  Students are then asked, “Altogether, how many elephants do you think would have been in each picture if the artist had drawn numbers for both numbers?”  I hope that students will not be confused by the fact the elephants missing from these problems were sometimes supposed to illustrate the first number in a code and sometimes supposed to illustrate the second number.

Page 63: “Addition with Raisins”

In this lesson, students are informed that it is possible to solve addition problems by drawing pictures of raisins.  Students are directed to draw raisins only for the green number in each code.  Then, for each problem, students are asked, “Altogether, how many raisins do you think would be in the picture if you had drawn raisins for both numbers?”  Students are directed to write their answer for each problem under the line in the code.  Finally, students are informed that somebody has already solved the first problem.  This lesson is similar to the previous lesson except that in this lesson, students must draw the necessary raisins themselves, whereas in the previous lesson, the necessary elephants had already been drawn.

Page 64: “More Raisins”

In this lesson, students are directed to choose either one of the two numbers in each addition problem and to draw raisins only for that one number.  After they have drawn the raisins, students are asked, “Altogether, how many raisins do you think would be in the picture if you had drawn raisins for both numbers?”  Students are directed to write their answers under the line in each code.  This lesson differs from the previous lesson in that here students are free to choose for themselves which of the two numbers to illustrate.  I hope that they will choose to illustrate the smaller of the two numbers in each problem, but it is okay if they instead choose to illustrate the larger number.


In Summary

The lesson on Page 64 (described above) is the final lesson in “Addition Part One.”  During the course of these lessons, students have encountered a great many addition problems, and they have learned how to solve them.  Along the way, they have discovered that addition problems are not just abstract number puzzles disconnected from the real world of everyday objects.  They have seen firsthand that the numbers in addition problems can be thought of as numbers of string beans or marshmallows or raisins or elephants or anything else.

Students will soon need to memorize the answers to addition problems involving very small numbers (a challenge that is addressed in “Addition Part Two”), and they will soon need to learn efficient methods for adding together very large numbers.  I hope the insights and understandings that students have achieved during these lessons will make those skills seem meaningful and potentially useful.  But I believe the real payoff will come when students are asked to solve story problems.  At that point, I hope students will find that they have already had quite a lot of experience imagining, thinking about, and reasoning their way through various numbers-related situations.  In fact, that is precisely what they have been doing on almost every page of these lessons.